Step 1: Access Your LoopingBack Account
- Go to LoopingBack and log in to your account.
- Feature Availability:
- NPS survey loops features depend on your subscription plan.
- If certain features are not accessible, you might need to upgrade your plan.
- Learn More About Plans:
- For detailed information about available features and plans, visit the LoopingBack Pricing Page.

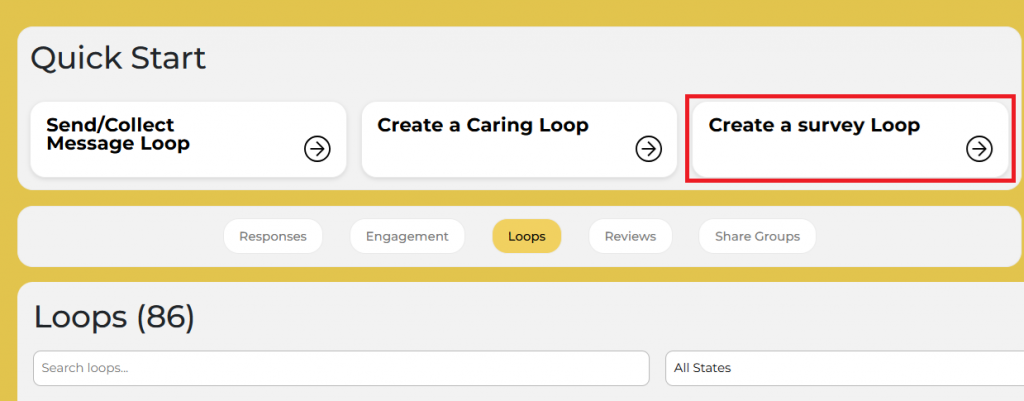
Step 2: Create a Loop
- From the Dashboard
- Choose from the following loop type:
- Click Create a Survey Loop
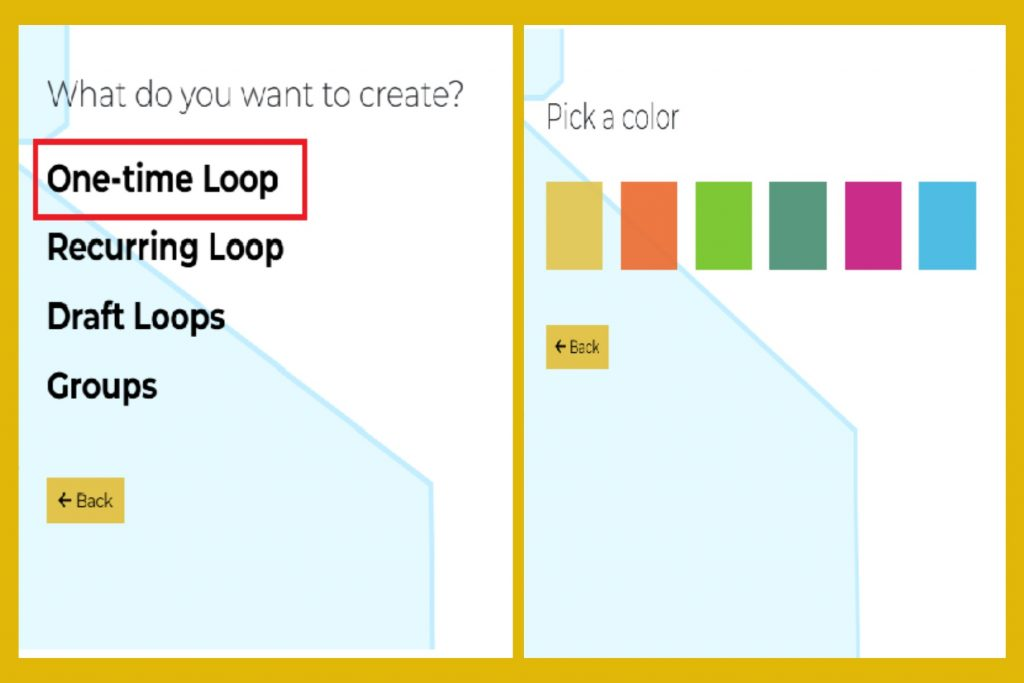
- Choose from the following loop type:
- Design the Loop:
- Choose Desired Color: Select your preferred color scheme to match your branding.
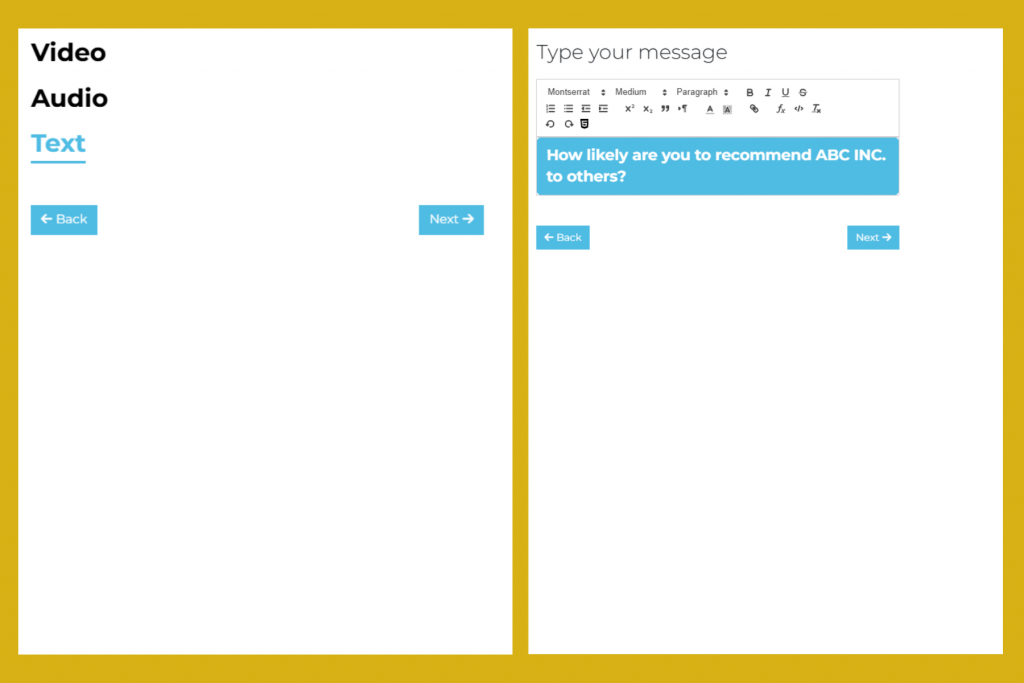
- Choose Desired Format: Select Video, Audio, or Text for how participants can respond.
- Click “Next” to proceed
- Design the Loop:
Step 3: Add Your Question
- “How likely are you to recommend [Company Name] to others?”
- Choose How They Can Respond:
- Video, Audio, or Text (Allow participants to respond in the format that suits them best, typically via text.)
- Multiple-Choice/ Multi-Choice (Select Many) Options (Customize Response Choices):
- 0-10 scale (Net Promoter Score format):
- 0 – Not at all likely
- 1-3 – Unlikely
- 4-6 – Neutral
- 7-8 – Likely
- 9-10 – Very likely
- 0-10 scale (Net Promoter Score format):
- Optionally, you can add custom options like:
- “Very Proud”
- “Somewhat Proud”
- “Neutral”
- “Somewhat Disappointed”
- “Very Disappointed”
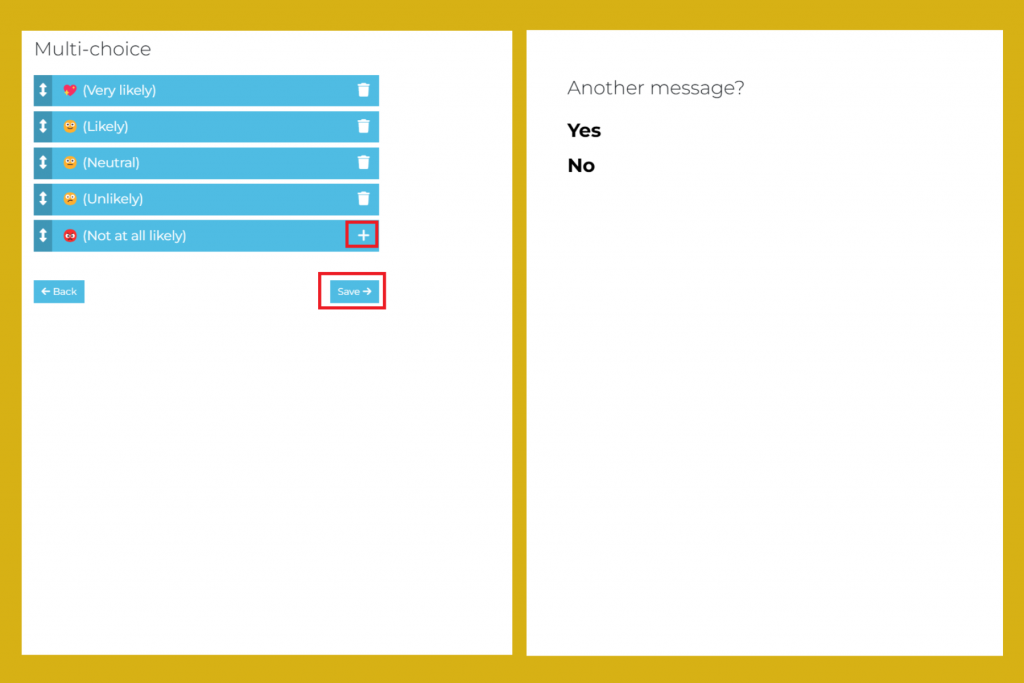
- You can also use emojis, such as:
- 💖 (Very likely)
- 🙂 (Likely)
- 😐 (Neutral)
- 😕 (Unlikely)
- 😡 (Not at all likely)
- Optionally, you can add custom options like:
- Purpose:
- Gather valuable insights on customer satisfaction and loyalty.
- This feedback can be used to calculate the Net Promoter Score (NPS), which helps benchmark performance and identify strengths and areas for improvement.
- Purpose:

Step 4: Add More Questions (Optional)
- If you plan to include more questions:
- Click “Another Message?” and select Yes to add another question.
- Repeat the process for each additional question, including setting up the format, response types, and choices.
- If you plan to include more questions:
- If you don’t need more questions:
- Select No to complete the survey setup.
- If you don’t need more questions:
- Examples of questions you can include:
- “How likely are you to recommend our new product/service to others?”
- “Based on your experience, how likely are you to recommend [Company Name] as a great place to work?”
- “How likely are you to recommend our support team to others?”
- Examples of questions you can include:
- This flexible structure allows you to easily adjust the question format to suit different contexts or goals, whether it’s for customer loyalty, product feedback, or employee satisfaction.
Step 5: Finalize and Share Your Survey Loop
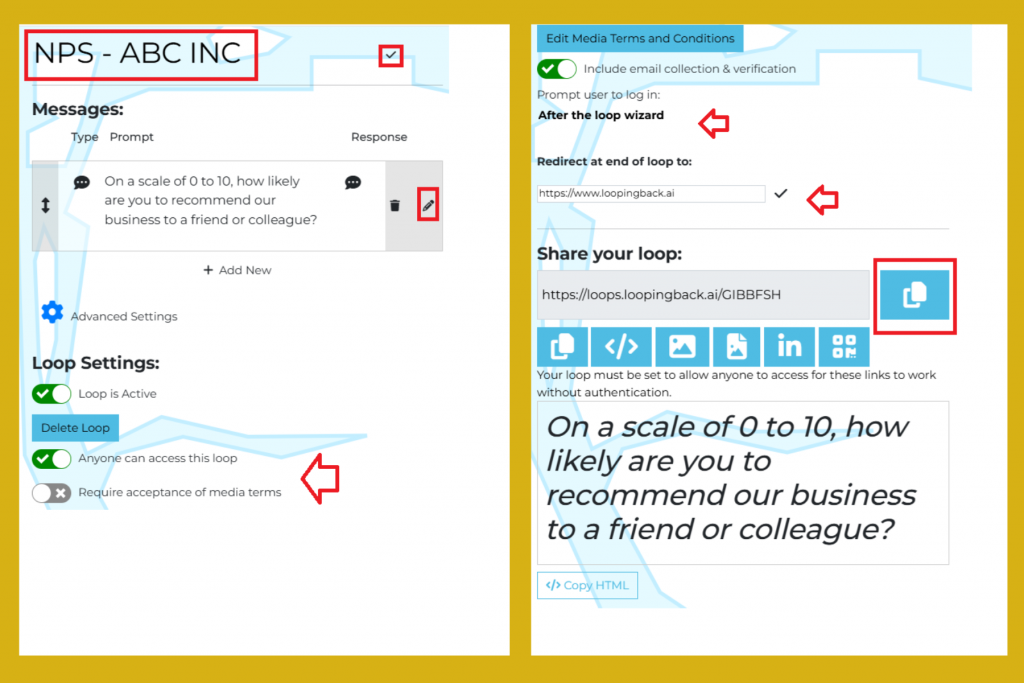
- Edit the Loop Title
- Update the Title:
- Click directly on the loop title to make edits.
- Once updated, click the check icon ( / ) to save your changes.
- Update the Title:
- Review Your Loop and Email Content:
- Double-check the loop content and email message for accuracy.
- To make changes, click the pencil icon and choose your desired edits.
- Review Your Loop and Email Content:
- Loop Settings
- Access Settings:
- Configure whether the loop can be accessed by anyone or restrict it with extra security measures.
- Access Settings:
- Apply Security Settings:
- To enable an option, click the side button until the icon is checked and green.
- To disable an option, click the side button until the icon is X and gray.
- Apply Security Settings:
- Edit Media Terms and Conditions
- Add Email Collection & Verification:
- For additional security, enable email collection by clicking the side button to ensure the icon is checked and green.
- To disable, click the side button until the icon is X and gray.
- Add Email Collection & Verification:
- Choose Timing:
- Set email collection to appear Before or After the Loop Wizard, based on your preference.
- Choose Timing:
- Redirect at the End of the Loop
- Set Redirect Link:
- By default, participants are redirected to https://www.loopingback.ai
- Update the redirect URL to another website if desired (e.g., https://microsoft-edge.en.softonic.com).
- Set Redirect Link:
- Share the Loop
- Copy the Link:
- Click “Copy Link to Clipboard” to distribute the loop manually.
- Share the loop via email
- Copy the Link:
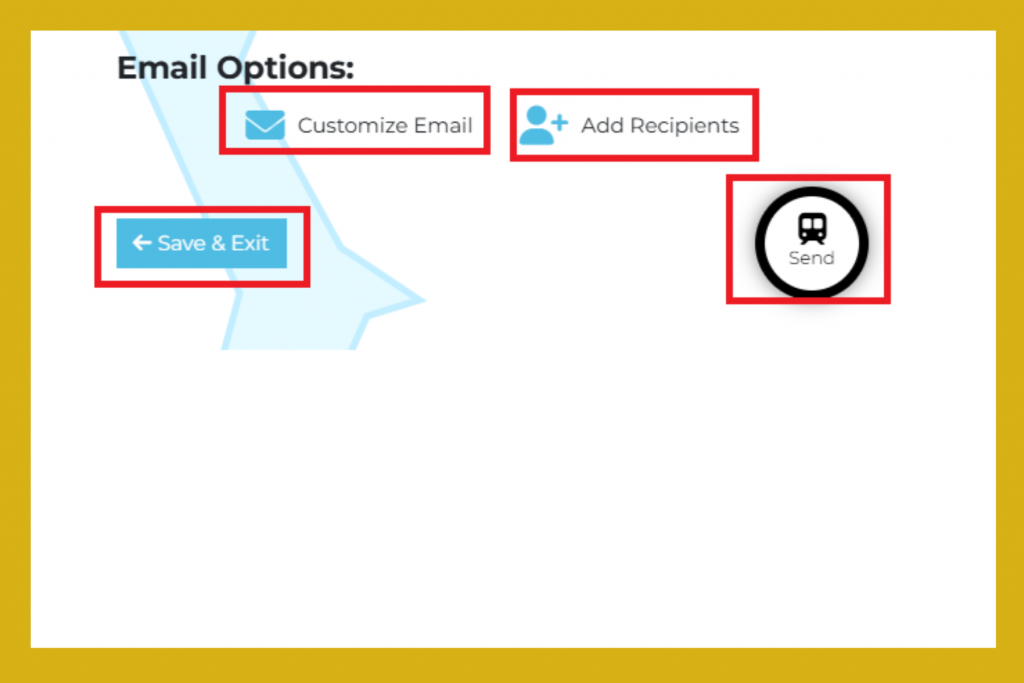
Step 6: Email Options and Share Your Loop
- This Is Another Way to Share Your Loop
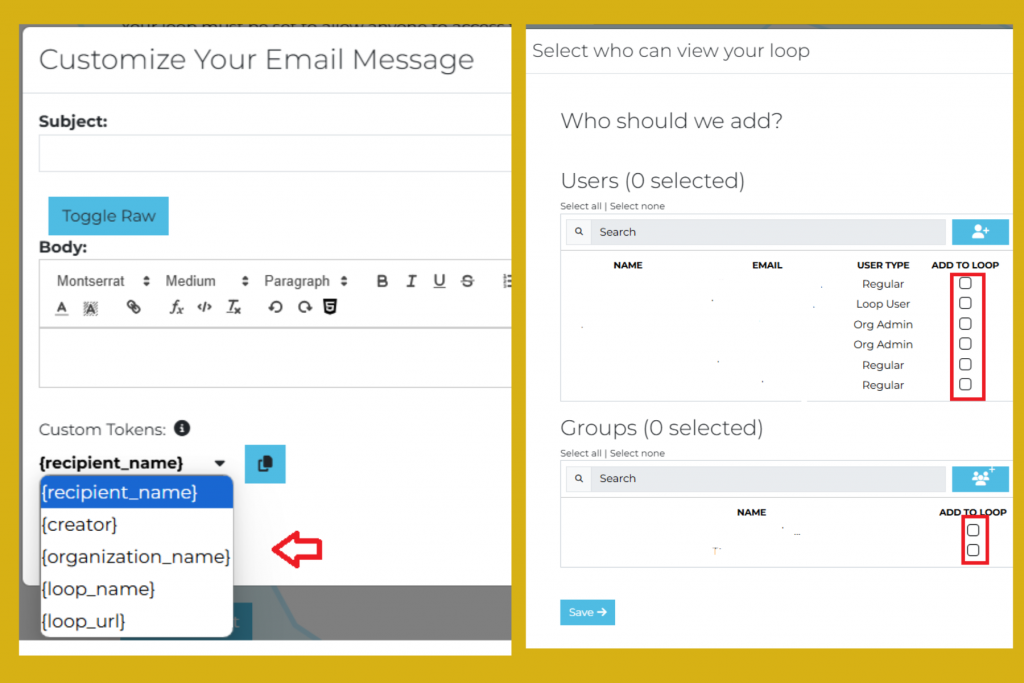
- Customize Your Email Message:
- Add a subject line for your email (e.g., “We’d love your feedback!”).
- Write the email body to explain the purpose of the survey and any necessary instructions.
- Edit Custom Tokens (e.g., recipient name or organization) to personalize your message.
- Save your changes when finished.
- Customize Your Email Message:
- Add Recipients:
- Manually enter individual email addresses or upload a contact list for bulk recipients.
- Add Recipients:
- Select Who Can View Your Loop:
- Click to Loop Your Desired User/Recipient: Choose specific individuals to receive the survey.
- Click to Loop Your Desired Groups: Select predefined groups for easier distribution.
- Select Who Can View Your Loop:
- Save Changes:
- Ensure all recipients and groups are accurately selected and saved.
- Save Changes:
- Click Send:
- Review everything to ensure it is correct, then click “Send” to distribute your loop.
- Click Send:
Key Information:
- Please refer to these links to review how to send or embed a loop: [put link here]
- Monitor Responses: Regularly check the LoopingBack dashboard for responses and feedback from your loop participants to ensure timely follow-ups and address any issues or questions
- Support Availability:
- The availability of support channels may depend on your subscription plan. If you encounter any issues during the process, please feel free to reach out to LoopingBack support. You can contact us through the following link: https://loopingback.ai/contact-us/